
News Categories
Recent News
Quality vs. Commodity: The Professional Way for How to Apply Window Tint
Learning how to apply window tint properly comes down to precise glass decontamination, custom thermal shaping, and micro-edge micro-squeegeeing performed in a strictly controlled, dust-free environment. Understanding the true window tinting process reveals that applying solar film is an exacting art form rather than a quick DIY weekend project.
For Hawaii vehicle owners, homeowners, and commercial property managers, a poor application creates far more than an eyesore. Cheap installation methods leave behind ugly bubbles, purple discoloration, and peeling edges, while risking permanent damage to defroster lines and vehicle electronics. In our intense tropical environment, improper application voids manufacturer warranties and fails to block damaging solar heat, leaving your interior unprotected.
In this guide, you will learn how a professional tint technician executes a flawless installation, how long does it take to install window tint, and how to distinguish lasting quality from cheap commodity work.
The Difference Between DIY Commodity and Professional Window Film Application
Mastering how to apply window tint requires far more than sticking a pre-cut sheet of film onto glass; it is a multi-stage engineering process designed to bond optical-grade material seamlessly to a surface. The professional installation process relies on high-grade solar control materials, specialized slip solutions, thermal shaping tools, and surgically clean environments. When executed correctly, the film forms an invisible barrier that reflects intense infrared heat and blocks up to 99% of damaging ultraviolet radiation.
Understanding the difference between an amateur attempt and a professional application matters directly for your bottom line and comfort. In Hawaii’s high-UV tropical climate, improper installation results in trapped debris, severe bubbling, and premature fading that ruins your view and compromises glass strength.
Relying on T&T Tinting Specialists ensures that your vehicle or property receives licensed, employee-owned craftsmanship backed by long-term warranty protection. Furthermore, choosing a specialized ceramic window tint installation provides maximum heat rejection without interfering with electronic signals or optical clarity.
When you invest in professional execution rather than a quick commodity fix, you secure immediate, practical advantages:
- Flawless Optical Clarity: Eliminates distracting hazing, micro-bubbles, and dust specks that obscure vision.
- Maximum Solar Defense: Protects leather interiors, hardwood flooring, and skin from aggressive sun damage.
- Long-Term Total Value: Avoids the costly expense of stripping and replacing cheap, failed film after just a few months.
A common misconception is that applying tint is a simple peel-and-stick task anyone can complete in a driveway. In reality, attempting to learn how to apply window tint without specialized equipment often leads to creased film, ruined defroster lines, and wasted money.
Step-by-Step: The Professional Way to Install Window Tint
Understanding how to apply window tint like a professional requires looking beyond basic tools and recognizing the exact sequence of craftsmanship needed for a permanent bond. A flawless application depends on controlled environments, absolute cleanliness, precise heat manipulation, and exact edge fitting. By reviewing the professional T&T Tinting installation process, you can see why certified technicians achieve seamless results that outlast DIY kits by years.
Here is the exact, step-by-step methodology used by industry experts to install high-performance solar film on automotive glass.
Step 1: Deep Cleaning and Multi-Stage Glass Decontamination
Before any film touches the window, the interior and exterior glass must be rendered surgically clean. Microscopic dirt, ocean salt mist, and oils will prevent proper adhesion and cause unsightly bubbles under the film.
- Scrape and Scrub: Technicians spray a dedicated slip solution onto the glass and use non-abrasive stainless steel blades to remove tree sap, road tar, and manufacturing overspray.
- Clay Bar Treatment: A fine detail clay bar is run across the surface to pull embedded contaminants out of the microscopic pores of the glass.
- Flush the Gaskets: Rubber window seals and sweeps are thoroughly squeegeed and flushed with pressurized water to prevent hidden dust from migrating onto the film during placement.
Step 2: Precision Measuring, Cutting, and Computer Plotting
Accurate fitting is essential for both function and aesthetics. Modern shops utilize digital cutting software matched to exact vehicle blueprints rather than hand-slicing film directly on customer glass.
- Digital Computer Plotting: Computerized plotters cut the film precisely to match the exact year, make, and model of the vehicle, guaranteeing perfectly uniform borders.
- Hand-Trimming Finishes: For custom installations or vintage vehicles, a master installer hand-trims the material with razor precision along the top edge of the glass, leaving a virtually invisible light gap.
Step 3: Thermal Heat-Shrinking and Contouring
Because window film is flat and automotive glass is curved—especially rear windshields—the film must be thermally trained to match the exact shape of the window.
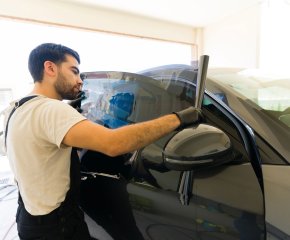
- Dry Heat-Shrinking: The technician lays the film on the outside of the window and uses a commercial-grade heat gun.
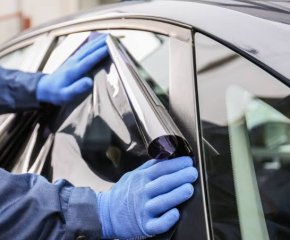
- Forming the Curve: As heat is applied, the installer carefully smooths out fingers and wrinkles with a hard card, shrinking the polyester layer so it snaps perfectly into the multi-dimensional curve of the glass without creasing.
Step 4: Film Placement and Fluid Extraction
Once shaped, the liner is peeled to expose the mounting adhesive. This step requires rapid execution in a climate-controlled room to avoid airborne dust contamination.
- Saturated Application: The exposed adhesive and the interior glass are saturated with a balanced mounting solution to allow smooth positioning.
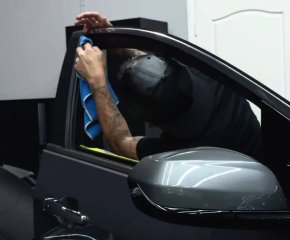
- High-Pressure Squeegeeing: Using heavy-duty, angled squeegees, the technician forces out 99% of the slip fluid from the center outward to the perimeter. This activates the pressure-sensitive adhesive and locks the film flat against the glass.
Step 5: Edge Micro-Tucking and Curing
The final details separate an amateur job from master-level work. Proper edge sealing ensures the film does not catch on weather stripping when the window rolls down.
- Micro-Tucking: The bottom edge of the film is tucked below the inner door seal so that rolling the window up and down never catches the bottom border.
- Curing Inspection: Technicians inspect the work under high-intensity LED light panels to verify edge alignment, optical clarity, and structural integrity.
Knowing how long does it take to install window tint helps set proper expectations for this detailed process. A complete vehicle application takes roughly 2 to 4 hours. If you are also protecting your vehicle's front bumper with paint protection film, the total time in the shop increases to accommodate both glass and body surface prep.
Mastering how to apply window tint is a balance of technical skill, specialized equipment, and extreme patience. Entrusting this work to experienced professionals ensures your installation looks factory-installed and performs flawlessly for a lifetime.
Real-World Scenarios: Choosing Quality Craftsmanship Over DIY Risk
Seeing how professional techniques apply in real-life situations demonstrates why mastering how to apply window tint requires dedicated equipment and training. Below are common scenarios where property and vehicle owners navigated the installation process to achieve long-term protection.
- The Coastal Homeowner Seeking Energy Relief: A Kailua homeowner noticed their beachfront sliding doors were allowing intense afternoon glare to fade hardwood floors and spike air conditioning bills.
Realizing that learning how to apply window tint on large architectural panes without creasing required specialized ladders and wide-format squeegees, they hired a licensed contractor. By choosing professional residential window tinting, they eliminated 80% of incoming solar heat while preserving their unobstructed ocean views.
- The Commuter Upgrading a Daily Driver: A West Oahu commuter wanted to cut down on daily cabin heat but wondered how long does tint take to install for a four-door sedan.
They opted for professional shop installation rather than attempting a driveway DIY job that risked dust contamination from windy trade winds. The three-hour service delivered immaculate, bubble-free glass that significantly reduced dashboard temperatures during afternoon traffic.
- The Commercial Property Manager Mitigating Glare: A Downtown Honolulu office manager needed to reduce employee screen glare across an entire floor of exterior windows. Rather than guessing how long does it take to do window tint across commercial glass, they partnered with experienced technicians who completed the project after hours, preventing business disruption while lowering HVAC cooling loads.
Investing in professional execution removes guesswork, ensuring clean application and immediate heat relief across every type of property.
Pro Tips for Evaluating Window Film Installation Quality
Understanding how to apply window tint is essential, but knowing how to evaluate the final results ensures you receive the long-term protection your investment deserves. These practical insights from expert installers help you identify true quality craftsmanship and avoid costly installation mistakes.
- Inspect the Glass Under Direct Light: Once your installation is complete, examine the glass under bright sunlight or a flashlight to check for specks of dirt or micro-bubbles. A master tint technician works in a dust-controlled bay to prevent airborne contamination, guaranteeing an optically clear finish without distracting imperfections that can distort your view while driving.
- Verify Top Edge Alignment and Micro-Gaps: Check the top edge of roll-down side windows to see how close the film sits to the glass border. Superior installations feature a virtually invisible micro-gap (less than 1/16th of an inch) or a shaved edge, ensuring the film never catches on rubber window weather stripping when rolled up and down.
- Ask About Expected Timelines: Inquire about how long do tints take to install before dropping off your vehicle. A thorough professional application typically takes 2 to 4 hours, allowing time for deep decontamination, heat-molding, and fluid extraction. Be cautious of shops promising 30-minute jobs, as rushed prep often leads to premature peeling.
- Choose Warranty-Backed Ceramic Films: Always request high-performance materials backed by manufacturer-supported nationwide warranties. Selecting FormulaOne ceramic window film ensures your film will not turn purple, bubble, or degrade over time when exposed to Hawaii’s harsh tropical climate and salt air.
Applying these best practices guarantees that your solar control investment delivers superior heat rejection, flawless optical clarity, and lasting durability.
Partner with Hawaii’s Premier Window Film Specialists
Understanding how to apply window tint with professional precision highlights why expert execution always beats DIY attempts. You now know how deep glass decontamination, digital computer-plotting, and thermal heat-shaping come together to deliver flawless heat rejection and long-term durability. Knowing how long to tint car windows helps you plan a seamless upgrade that protects your interior from Hawaii’s relentless sun exposure.
Taking action today protects your automobile, home, or commercial building from irreversible UV damage, upholstery fading, and uncomfortable heat build-up. Choosing employee-owned craftsmanship gives you total peace of mind, knowing your glass defense is installed correctly the very first time.
Ready to experience superior comfort and solar protection backed by 40+ years of local trust? Contact the expert team at T&T Tinting Specialists today to request a free quote or schedule your professional window film installation!
Frequently Asked Questions About Window Tint Installation
Can I learn how to apply window tint myself using DIY kits?
While DIY kits exist, learning how to apply window tint without professional tools and dust-controlled bays usually results in creased film, trapped dirt specks, and bubbling. DIY installations lack precision computer-cutting and thermal heat-shaping, which often leads to peeling edges that void manufacturer warranties and require costly removal.
How long does it take to do window tint on a standard car?
A professional application on a standard passenger car typically takes 2 to 4 hours. Knowing how long does tints take to install helps you plan your appointment. This timeline includes multi-stage glass decontamination, digital film plotting, heat-shaping, and high-pressure squeegeeing to ensure an optically clear, long-lasting bond.
How long does tint take to install on a full-size SUV or truck?
Full-size SUVs, trucks, and minivans generally require 3 to 4 hours due to additional glass surface area, steep window angles, and intricate rear quarter panes. An experienced tint technician takes the extra time needed to heat-shrink the film around complex glass curves, ensuring seamless coverage across every window.
Why does a professional ceramic window tint installation perform better?
A professional ceramic window tint installation utilizes advanced nano-ceramic technology that blocks up to 99% of infrared heat without blocking electronic signals. Standard dyed films only offer privacy and basic shade, whereas professionally applied ceramic films deliver superior solar heat reduction and unmatched optical clarity.
About the Author
Ryan Malaluan, CAPM®, is an SEO & Content Strategist with over 8 years of experience in SEO, content strategy, and digital marketing. He holds a Bachelor of Arts in Literature and is a Certified Associate in Project Management (CAPM®). Throughout his career, Ryan has worked with brands including Spacer, Airtasker, Marlee (formerly Fingerprint for Success), VEED.IO, and ROSEMET LLC, as well as several digital marketing agencies, helping businesses strengthen their organic visibility through strategic, results-focused SEO and content.



.
.